
Seal & Savor: A Guide to Preparing and Freezing Meals for Busy Lives With Vacuum Seal Bags
Posted by Ola Griffin on Dec 22nd 2023

My mother recently experienced a fall, and I feel incredibly fortunate to have her back safely in her home. As I assist her during this time and provide care until she is ready to be independent again, I take on the responsibility of preparing meals. I ensure they are not only nutritious but also convenient for her to heat and enjoy once I return to my own home.
Whether you're caring for a parent or navigating the hectic schedule of being a busy mom or dad striving to serve wholesome meals, there are compelling reasons to opt for vacuum-sealed bags when preparing food.
As a former baseball mom with my two youngest actively involved in the sport, having readily available crockpot meals proved to be a genuine lifesaver. During those hectic days, prioritizing the delivery of healthy and delicious meals over fast food was paramount for me. Today, my sons, now healthy and grown men, appreciate the value of meals crafted with care by their mom.
Staying busy doesn't have to translate to frequenting the fast-food drive-thru 3 to 4 days a week. Prepare some quick-and-go meals by tossing ingredients into the crockpot, ensuring a satisfying home-cooked meal upon your return.
Instead of letting leftovers go to waste, explore alternative storage methods. Discover enjoyable additions to your freezer for beloved meals or desserts to savor later. These instant meals make for easy heat-and-eat dinners. Whether it's turkey remnants or simply a desire to break the monotony of leftovers, freezing them is a viable option. Don't limit yourself to the immediate aftermath of Thanksgiving and Christmas; stash some of those leftovers for months to come.
In the wake of Thanksgiving, I repurposed all that leftover turkey into a variety of dishes. Beginning with a heartwarming Turkey Noodle Soup, I moved on to crafting delectable Turkey Enchiladas. Utilizing the remaining turkey enchilada filling, I whipped up a flavorful Chicken Tortilla Soup. Lastly, a generous 9x13 Turkey, Rice, and Cheese Casserole graced our table. We relished these meals, and any surplus found its way into the freezer for future enjoyment.
However, I have used freezer style bags with zip closures that in a short amount of time filled with freezer burn. All that hard work was wasted. The optimal solution I found for freezing is vacuum-sealed bags. Employing these techniques not only extends the shelf life of frozen meals and food but also proves remarkably simple.
Vacuum Seal Meals Without Excess Liquid
- Allow the food to cool.
- Set up my vacuum sealer.
- Choose the appropriate PackFreshUSA Vacuum Sealer Bag size (Pint, Quart, or Gallon) based on your requirements.
- Label the bag with the food type and date (I prefer using a regular Sharpie).
- Place the food into the bag. Include an oxygen absorber.
- Ensure the open edge is free from food debris, as it may impact the vacuum process.
- Insert the bag's edge into the vacuum sealer, lock the machine, and press the vacuum button.
- If your vacuum sealer offers various sealing options, consult the operation manual to determine the best one for the specific food item.
- Optional: For added security, I opt to double-seal the bags by adjusting the position and using the SEAL-only button.
- Place the sealed bag in the freezer.
- Enjoy the meal at a later date by defrosting, heating, and savoring.
Vacuum Sealing Soups and Other Liquid Items
To vacuum seal food items containing liquid, simply follow the steps outlined above (1-5). Afterward, secure the edge of the vacuum bag with chip-style clips or carefully place the bag in the freezer, ensuring the folded or open end is kept upright. Once frozen, proceed with the remaining steps.
So come join me on this fun food frenzy, making homemade meals for my Mom. These meals can be adapted to single person use or for family meals.
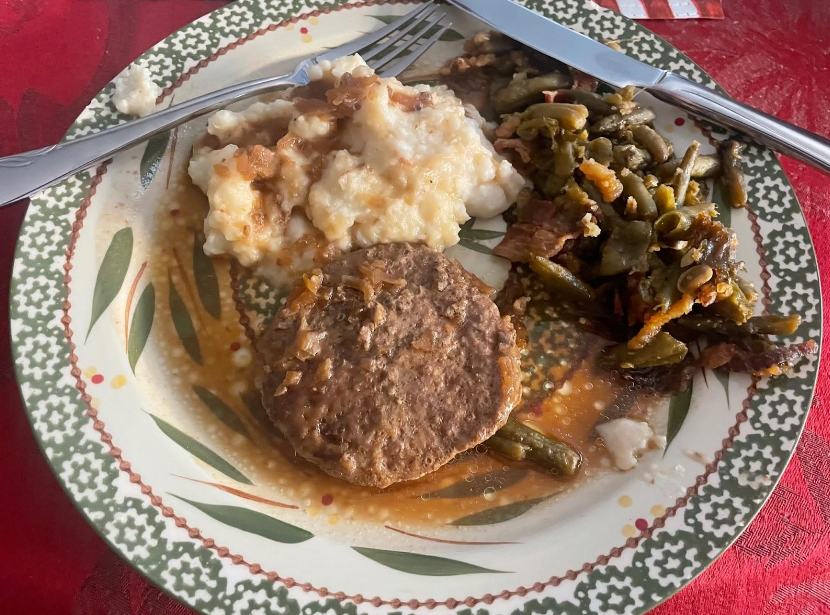
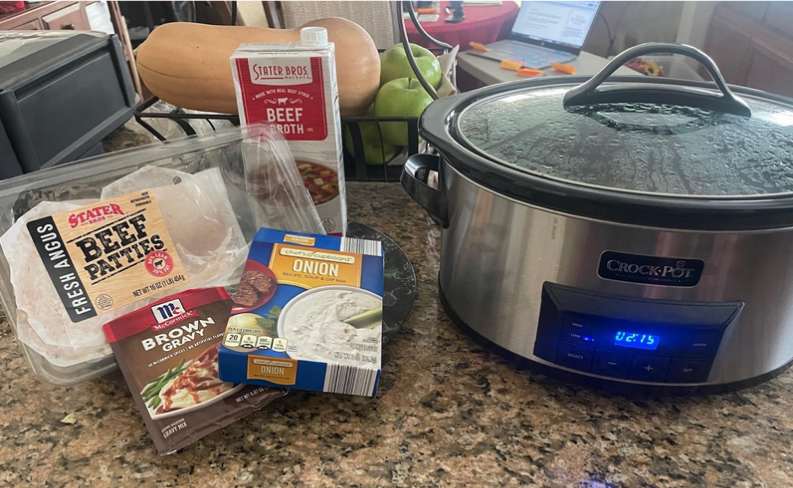
Easy Salisbury Steak
Ingredients:
- 4-6 beef patties (80/20 or 90/10) or cube steak
- 1 packet Brown Gravy Mix (e.g., McCormick)
- 1 packet Onion Soup & Dip Mix (e.g., Aldi Brand)
- 2-4 cups beef broth
Instructions:
- Begin with 4 to 6 lean beef patties (I used 80/20).
- Add 1 packet of Brown Gravy Mix (McCormick) and 1 packet of Onion Soup & Dip Mix (Aldi Brand).
- Pour in 1 to 2 cups of beef broth.
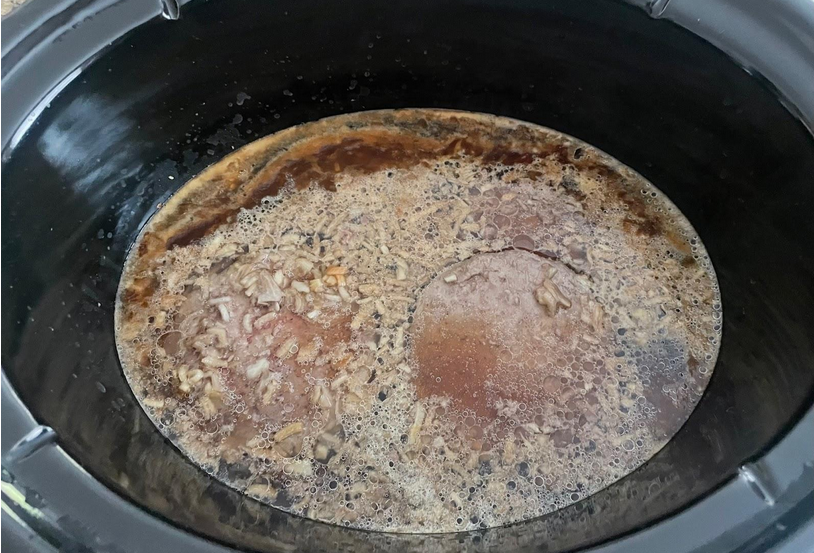
- If using a crockpot, mix the liquid and seasoning over medium heat and pour it over the meat placed in the crockpot.
- Add more beef broth to cover the patties; I used a total of 4 cups in my crockpot.
- Set the crockpot on LOW for 3 hours.
- If the broth is too runny, add a few tablespoons of cornstarch.
- Remove the beef patties.
- In a separate bowl, mix 1 tablespoon of cornstarch with 1 tablespoon of water; add to the broth and whisk well.
- Increase the crockpot heat to high and, if needed, repeat the cornstarch-water mixture to achieve the desired thickness.
- Allow the mixture to boil to fully thicken.
- Enjoy your delicious and easy Salisbury Steak!
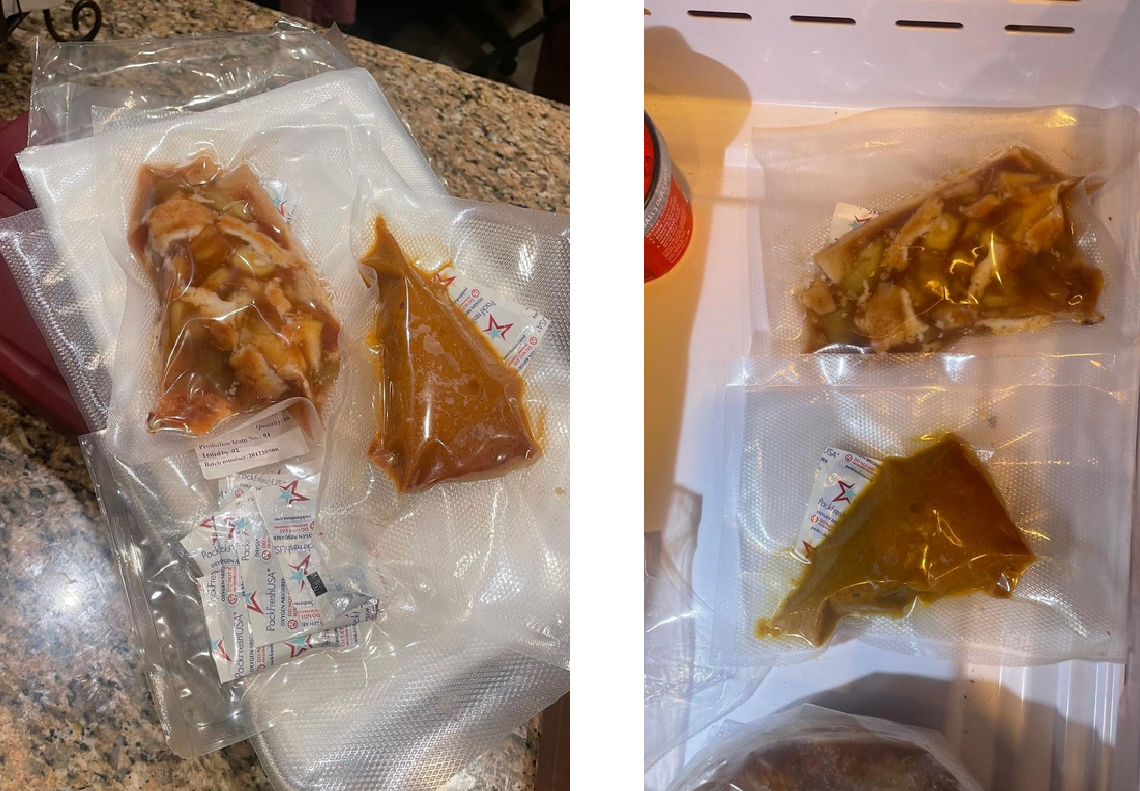
Freezing the Leftovers
After my mom and I enjoyed the Salisbury Steak with Thanksgiving leftovers—mashed potatoes and green beans—I decided to preserve the remaining two patties. Placing them in PackFreshUSA Quart Vacuum Bags, I divided the broth/gravy between the two. One bag received an addition of mashed potatoes, while the other contained only the patties and broth. This versatile dish can also be served over egg noodles or rice. I prefer pre-freezing the liquid before vacuum sealing the bags.
For those who like to plan ahead, you can assemble the liquid and seasonings in a vacuum-sealed or Freezer Zip bag and combine them before adding the patties. Seal the bag, pre-freeze it, and then seal it again once the liquid is solid.
This simple yet incredibly tasty meal is perfect for meal prepping. Mix all the liquid and seasonings in PackFreshUSA Vacuum Sealer Bags, add the beef patties, and vacuum seal the bags.
If you encounter issues with liquids leaking during vacuum sealing, freeze the meal prepped food first and then vacuum seal the bag. To enhance preservation, consider adding a low-end oxygen absorber when vacuum sealing for the freezer. This helps remove residual oxygen, reducing the risk of freezer burn and extending the food's shelf life in the freezer.
Click here to check out a TikTok video for a visual guide to the vacuum sealing process
Why I Use Oxygen Absorbers in My Vacuum Sealer Bags
I employ small-size oxygen absorbers to extend the freezer life of food. While vacuum sealers don't eliminate 100% of the air, averaging 70-80%, depending on the model and food, these absorbers help remove residual oxygen, ensuring longer storage in the freezer.
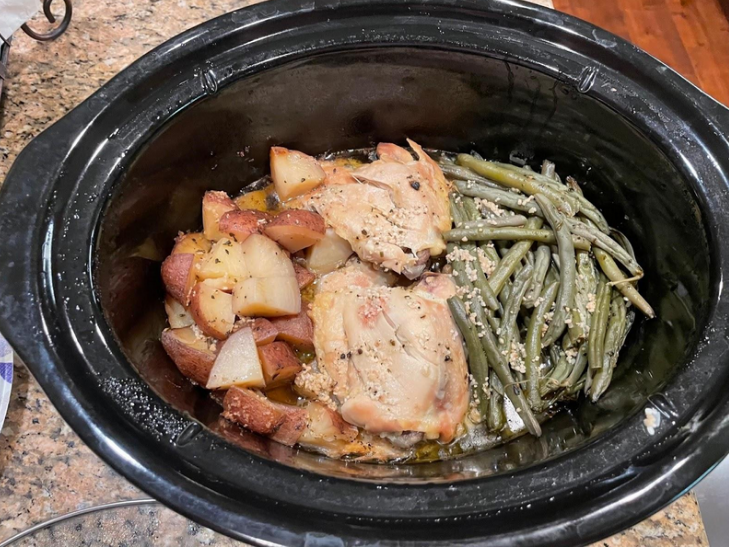
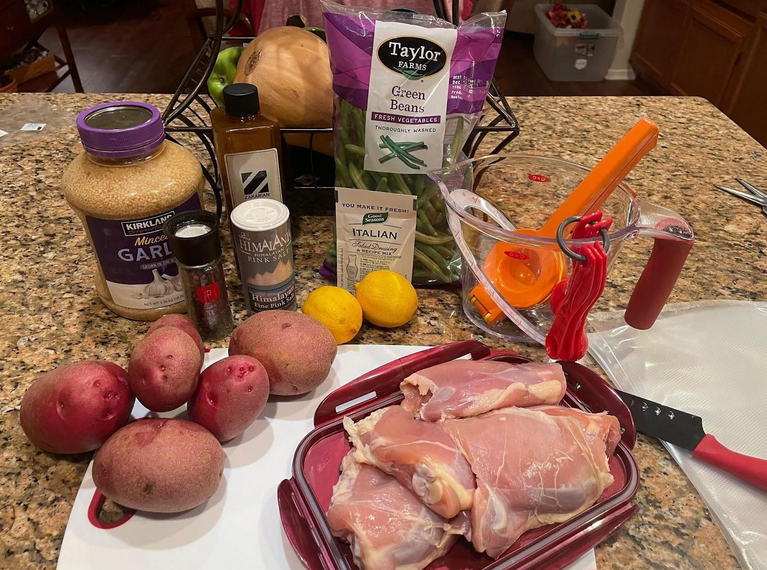
Chicken, Potato, and Green Beans
Ingredients:
- 6-8 chicken thighs (skin removed) or 3-4 boneless chicken breasts
- ½ lb green beans (prepped whole or use frozen)
- 4 cups red potatoes, cut into large bite-size pieces
Secret Sauce:
- Italian dressing (dry pack)
- ⅓ cup fresh lemon juice
- ¼ cup olive oil
- 1 teaspoon crushed oregano
- 1 teaspoon salt
- ½ teaspoon pepper
- ¼ teaspoon onion powder
- 2 teaspoons crushed garlic or 1 teaspoon garlic powder
Instructions:
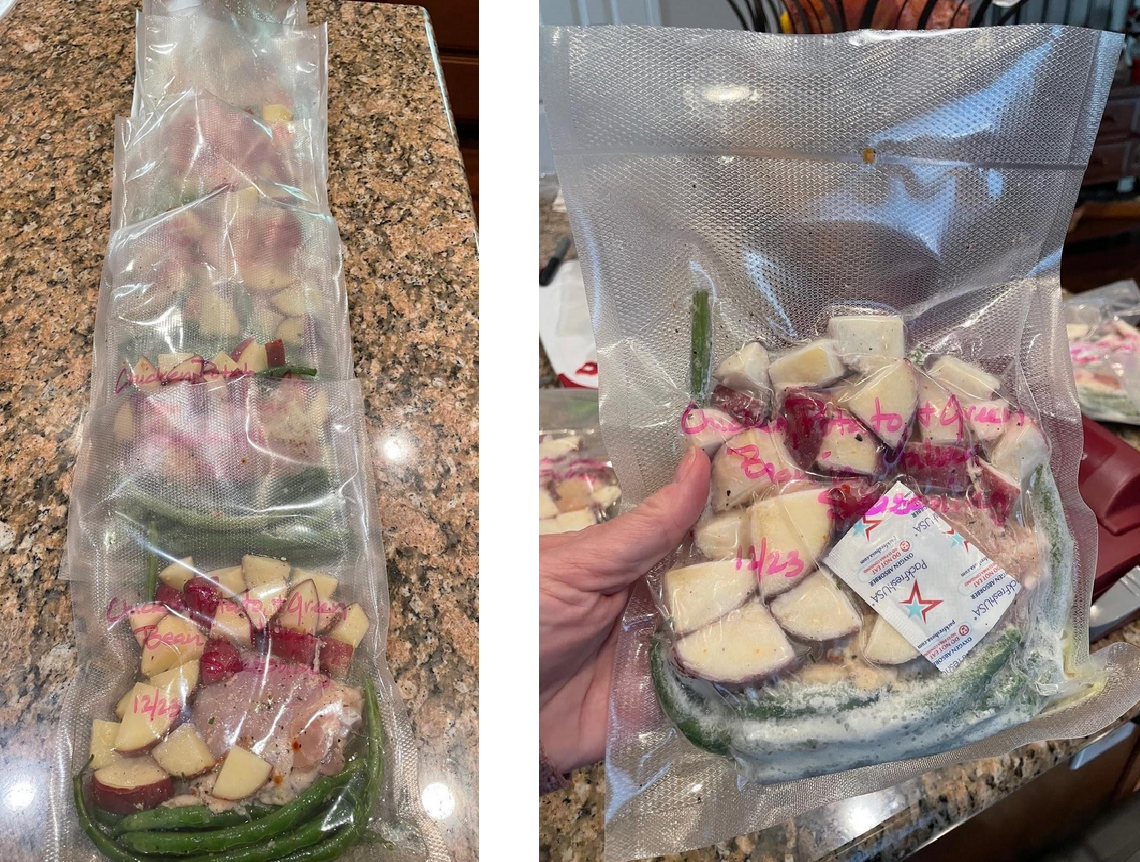
- Place chicken in the center of your crockpot.
- Stack the potatoes on one side and arrange the green beans on the other (you can use frozen green beans as a substitute).
- In a bowl, mix together the Italian dressing, fresh lemon juice, olive oil, crushed oregano, salt, pepper, onion powder, and crushed garlic (or garlic powder) to create the secret sauce.
- Pour the prepared sauce over the entire meal in the crockpot.
- Cook for 4 hours on high or 6 to 7 hours on low.
- Enjoy this delicious and easy meal!
Click here to check out a TikTok video regarding prepping this meal

Easy Turkey Noodle Soup
Ingredients:
- Leftover turkey (about 2-3 cups), shredded
- 1 onion, finely chopped
- 1 heaping teaspoon garlic, minced
- Celery, chopped
- Carrots, chopped
- 6 cups chicken stock
- Peas (optional, if frozen)
- 1 tablespoon chicken bouillon (e.g., Better Than Bouillon Chicken)
- Salt and pepper to taste
- Sage (optional, for added depth)
- ½ bag of noodles
Instructions:
- In a pot, sauté chopped onion until clear.
- Add minced garlic and stir, then incorporate celery and carrots. Mix for 30 seconds.
- Pour in 6 cups of chicken stock and add the shredded leftover turkey (about 2-3 cups). Mix well.
- If desired, add frozen peas or any other veggies.
- Stir in chicken bouillon, and season with salt and pepper to taste.
- Optionally, enhance the flavor with sage or chicken seasonings containing sage.
- Adjust the soup broth to your liking and bring it to a boil.
- Once boiling, add ½ bag of noodles.
- Allow the noodles to cook until tender.
- Enjoy this delicious and easy-to-make turkey noodle soup.
Turkey Rice Veggie Casserole
Ingredients:
- 1 tablespoon olive oil
- 1 tablespoon butter
- 1 medium yellow onion, diced
- ½ bag of mini carrots (thinly sliced) or 2 large peeled carrots
- 1 to 2 tablespoons garlic (minced)
- 1 cup long-grain white rice (Jasmine)
- 1 cup water
- ½ cup heavy whipping cream
- 1 can Cream of Chicken Soup
- 2 cups chicken broth (low sodium)
- 1 tsp poultry seasoning
- 1 tsp Worcestershire Sauce
- 1 to 2 cups frozen peas
Instructions:
- Preheat oven to 375 degrees F.
- Prepare the topping by crushing Ritz crackers in a zip bag or using a food processor until fine crumbles. Mix with melted butter.
- In a medium-sized pan, melt the oil and butter. Add diced onions and carrots; cook until onions are clear. Add minced garlic and stir for about 30 seconds.
- Introduce wet ingredients: Cream of Chicken Soup, water, chicken broth, and all seasonings. Mix well to break down the soup. Add rice and stir, cooking until rice is done (20 to 25 minutes); avoid overboiling.
- Incorporate turkey, Worcestershire sauce, and peas. Stir to combine.
- Grease a 9x13 dish for a thinner casserole or an 8x8 for a thicker one. Pour the mixture into the casserole dish. For cheese lovers, sprinkle Parmesan cheese on top.
- Finish by adding the topping of melted butter and crushed Ritz crackers over the casserole.
- Cook uncovered for 20-25 minutes at 375 degrees until the topping is brown and the casserole is bubbly.
- Allow the casserole to cool for about 5 minutes before serving.
- Enjoy your delicious Turkey Rice Veggie Casserole!
Click the here to see how I vacuum sealed this into personal meals to simply thaw, heat, and eat
PIE - Oh’ my!
Yes, you can take your extra desserts such as your holiday pies, and put them away for a later date. I always add an oxygen absorber since that assures me that these pies are as oxygen free as they can be.
Click here to check out the Pie Preservation tiktok video
With the holiday season in full swing, I want to wish everyone the very best. May the New Years bring you health and happiness! I am starting a new series of how many pounds of food will fit in our PackFreshUSA® Combination 7 Mil Mylar Box Set for 1 person for 1 year. Looking forward to continuing to share my love of prepping.
Happy Holidays,
Ola D Griffin
Long-term Food Storage Expert
Customer Service, Safeguard Brands, Inc. dba PackFreshUSA
YouTuber Pandemic Prepsters - YouTube
Instagram - Ola Dee Griffin (@preparedness101) • Instagram photos and videos
Tiktok - oladeegriffin (@oladeegriffin) | TikTok

|
|
Phone:(844) 857-8277 Mobile:(951)902-4644 Email: customerservice@packfreshusa.com Website: www.PackFreshUSA.com Toll Free 5 Star Service Line: (844)8 5 STARS (844) 857-8277 |